
This tutorial will walk you through the process of mapping your custom domain with your SnapSite website. If you run into any problems during the domain mapping process, please create a support ticket from your SnapSite dashboard and our team of experts will be more than happy to assist!
Pointing Your Domain to the SnapSite Servers
Before mapping your custom domain, you need to update your DNS entries to point your domain to the SnapSite servers.
1. Take note of the SnapSite server IP address (104.131.102.92)
2. Log into your domain registrar account (the place you purchased the domain from) and find your DNS settings.
3. Locate your domain’s primary “A” record and change the IP address to the SnapSite server IP address listed above. You will also find this IP address listed in your domain mapping screen.
**If you are unsure how to make these changes on your own, you can open a support ticket with your domain registrar and send them the instructions above. They will be able to make this update for you. This is not something the SnapSite support team can assist with.
Wait approximately 1-3 hours for the DNS server changes to propagate. Once the DNS changes are made, it could take up to 3 hours depending on your provider for the DNS changes to propagate on the servers.
Mapping Your Custom Domain
Once your domain’s DNS servers have been updated and they have propagated, you can proceed with the domain mapping from your SnapSite Dashboard.
1. From your SnapSite Dashboard, click the “Map Custom Domain” icon from the Site Tools menu.

2. In the top right side of the screen, you will find the domain mapping section. Please make sure to read all instructions carefully.
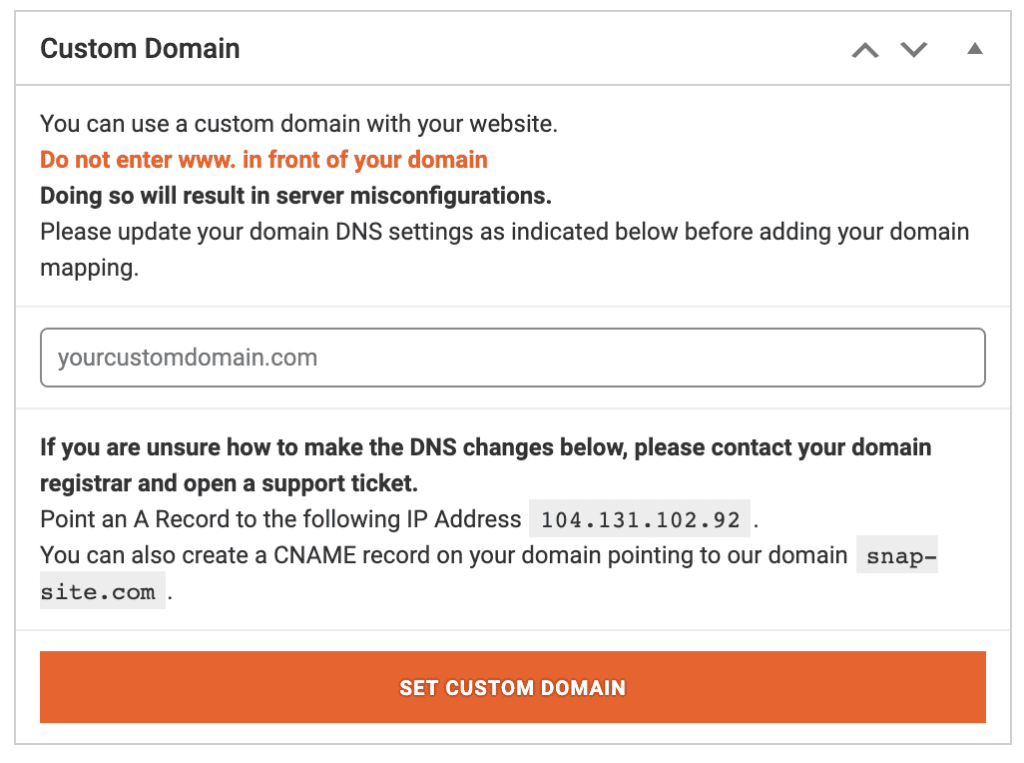
3. Add your custom domain WITHOUT the leading www. in front of it.
**Adding your domain with the leading www. will lead to server misconfigurations.
4. Click the “Set Custom Domain” button.
5. Make sure to read through the warning message. Once you have read through, click OK
After clicking OK, wait approximately 15 minutes while our servers are configured and your SSL Certificate is issued for your custom domain. After 15 minutes, log out of your admin dashboard and try to load your website using your custom mapped domain. If the site loads without any problems, you are all set!
**After mapping a custom domain, the login link for your website will change. The new login link for your website will be as follows: https://yourcustomdomain.com/sitedashboard
You may not use your new login link to log back into your SnapSite dashboard using your custom domain. When clicking “Visit Site” from your SnapSite Dashboard, you will now be taken to your website using your custom mapped domain.
If you have any issues during this process, please open a support ticket through your SnapSite Dashboard. If you are unable to access your SnapSite Dashboard, you can open a support ticket by visiting this url: https://www.snap-site.com/support
